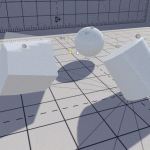
The Cross Product – For 3D Artists

In my last “Math For 3D Artists” post, I took a look at the Dot Product which is a simple, and immediately useful for artists, especially when writing shaders.

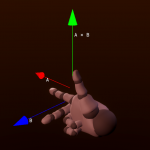
The Cross Product however is a powerful tool in the 3D rendering pipeline responsible for a lot of triangle calculation which makes what 3D artists do, work. In this post I’m going to explore what the Cross Product enables, and a more accessible use case for artists in Shader Graph.

Unity Material Property binding and the Lightmapper

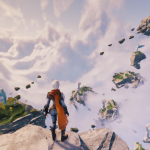
Had an interesting one this week with Unity’s lightmapper, and trying to bind parameters to complex shaders. This is one of those problems which makes sense in hindsight, but isn’t clearly documented.

Treat this more like notes / thoughts then a walkthrough. I also won’t be sharing much code here, but will happily answer questions on my socials.

Container Water 06: Leaving ShaderGraph behind

If this is your first exposure to this series of posts about the “Container Water”, you’ll not “heard” me moaning about ShaderGraph. Well, over my travels, I’ve been getting progressively more frustrated at the speed in which ShaderGraph allows me to work.

This post is a slight departure from the rest of the series as I want to record some of my techniques from moving back to HLSL from ShaderGraph, in the hope that others will find it useful until Unity catch up.

Container Water 05: The new Normal

I didn’t want to age any of these posts my making 2020 references, but for an article about creating new normals… I couldn’t help it.

I just wandered through the process of putting together the first iteration of the fluid shader, but I was not happy with how the recalculated surface normals had turned out using ShaderGraph’s “Normal from heightmap” node. Vertex deformation in shaders wasn’t exactly new to me, however I’d not needed to re-compute the surface normals before – previous modifications hadn’t been drastic enough, so time to get my hands dirty-er.

Container Water 04: Creating the “First” Shader

Now that we have the two main visual foundations of this effect ready (the general shape, and the surface sim), it’s time to put them together in a shader. As I am Fish is the studio’s first project using Unity’s HD Render Pipeline, this is going to be an interesting experience, and my first real foray into Shader Graph.

Spoilers, I’m not a fan so far.

Container Water 03: 2D Surface Sim

With the water constrained into the bowl, I’ll now move onto the surface simulation. Here I wanted something more than sine waves for the surface of my water sim, mainly because our fish inside the bowl ideally want to interact with the water’s surface.

Damoiseaux described in his breakdown how he had used a spring system to simulate physics for the surface of his water, it’s something I’d never done before, but had been assured by the code lead at the time it was straight forward enough an algorithm.

Container Water 02: Constraining the water to the bowl

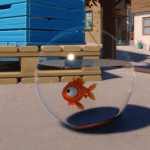
As I found in the last post in this series, just pushing verts down to the water’s surface comes with an immediate issue (as seen above in the featured image).

The verts very quickly fall outside of the original volume, which breaks the effect. Now if it was a sphere, we could mitigate this by not reducing the water level below the half-way mark, but this doesn’t help if our simulation wants to displace water beyond this. So we need a solution.

Container Water 01: Flattening the surface

This is the second post (See the first here) in the my “Container Water” series where I’ll be going step by step (more-or-less) into how I’ve approached the creation of this effect for I am Fish. This post goes into detail about where I started with this effect, and at the time of writing the whole system is still heavily WIP.